Congratulations! Your journey to clean energy has begun. You’re about to install your solar panels. Before you do that, you must be wondering how to test your solar panels. Most people overlook this procedure despite its importance.
Checking your solar panel’s output is crucial because it prevents you from installing panels that are non-functional or not operating at their full capacity. You don’t have to go through this kind of trouble. This guide will show exactly how to test solar panels and ensure they are in perfect condition for use.
How to Test Solar Panels Step by Step
A Checklist Before You Start
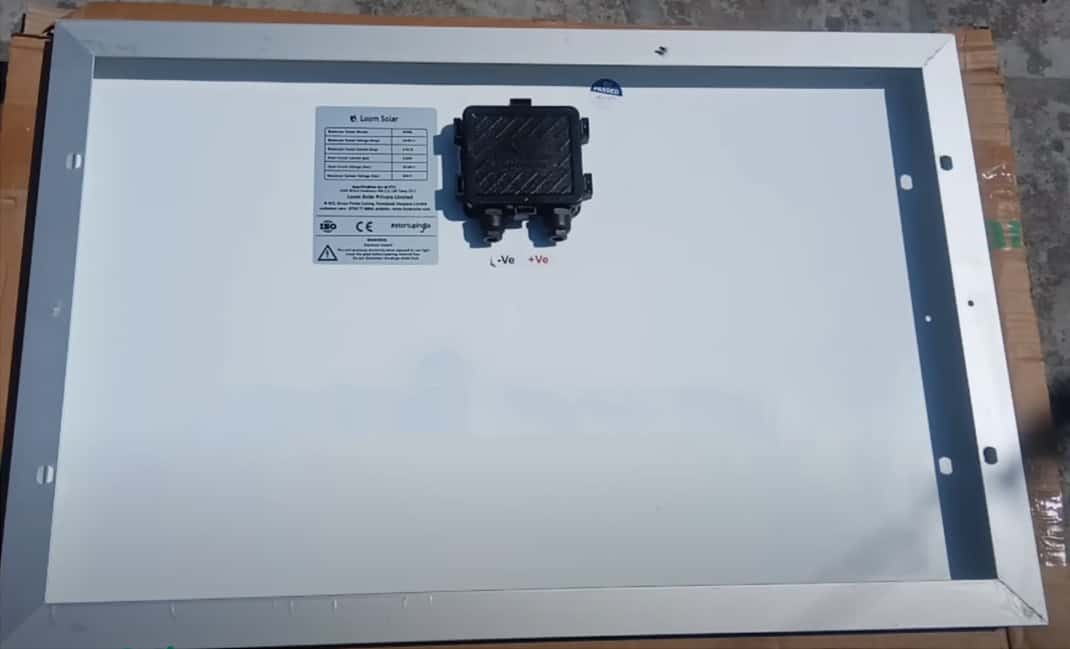
Find out the voltage and current ratings of your solar panel. Often, you can find these ratings at the back of the panel. Ensure the sunlight conditions are superb. If the sunlight is not directly hitting your panels or if the rays are weak, you won’t get an accurate reading.
You will need a multimeter, so familiarize yourself with its use and how to get an appropriate reading. Remember, testing a charge controller is most accurate when the battery is not full. This is because a fully charged battery will not draw current.
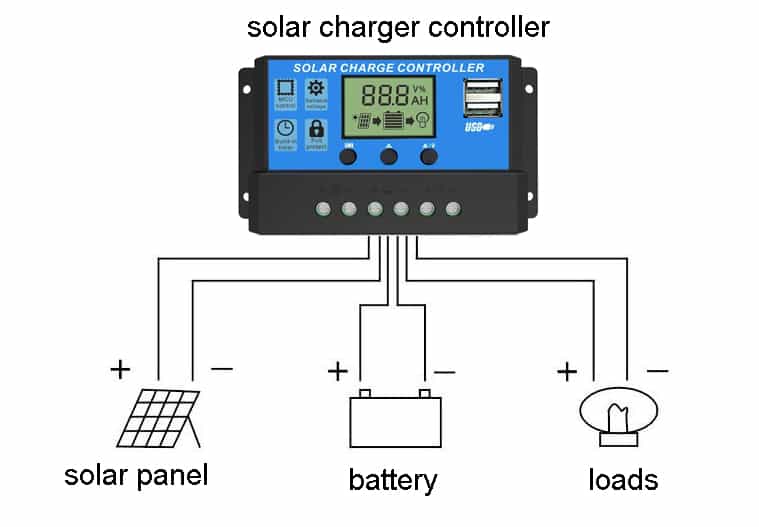
To avoid damaging your panels, always connect the regulator to the battery first, then connect the solar panel to the regulator. Always disconnect a solar panel from the regulator first, then remove the regulator from the battery.
What You Should Know About Solar Panel Systems
Electrical current is usually under two categories: alternating current or AC and direct current, also known as DC. While DC only flows in one direction, AC keeps reversing. Solar panel output is measured in watts because most household appliances use power in this format.
Power (Watts) = Voltage (Volts) x Current (Amps)
Therefore, to calculate the panel’s output, you have to determine the voltage and amperage.
Solar panels have photovoltaic cells that convert sunlight into electricity. The cells are mostly made of silicon – a semi-conductive material. The electric current produced by a solar panel usually goes into an inverter.
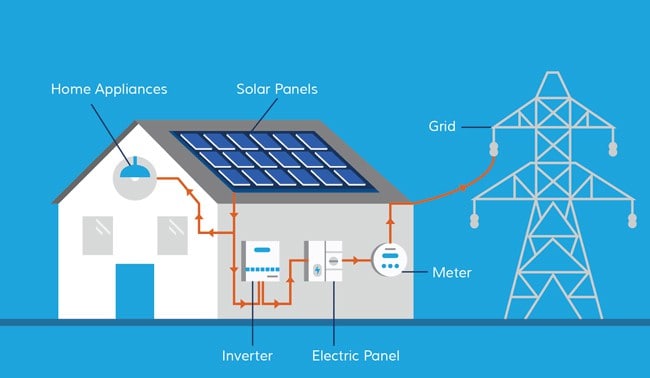
Although solar panels generate DC electricity, most homes need it in AC format. Therefore, the inverter’s work is to convert electricity from DC to AC.
The good news is that there’s no wastage with solar. Why? The utility sends any excess electricity to the primary grid. Those who produce more than they consume get credit for the excess. Those who use more than they generate, pull the excess energy. This crediting system comes in handy when tied to a grid, especially during the night.
Calculate The Solar Panel Amperage
To find out your panel’s amperage, you need a device called an amp meter. This device is what you attach to the solar panel to measure output.
Remember, test the panel under direct sunlight to get an accurate picture of the output. Don’t buy an amp meter that can’t measure up to your solar panel’s maximum output. Always choose one that can handle a higher range.
Determine The Current
To do this step correctly, get a hold of resistors and a multimeter.
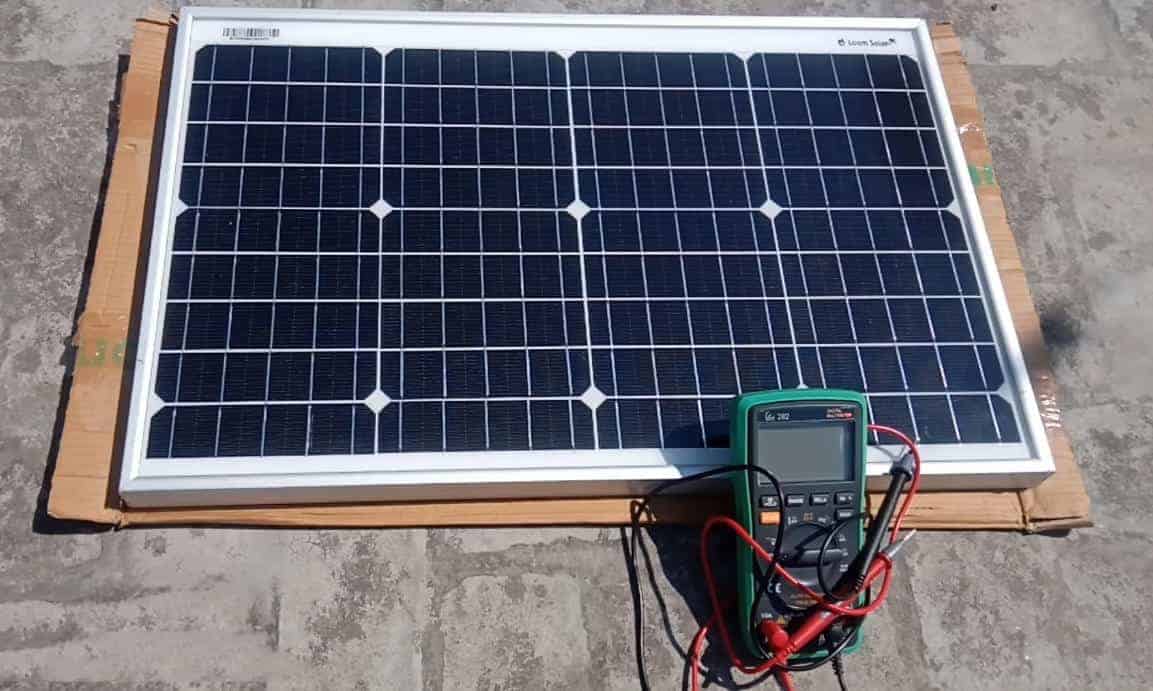
How to Test a Solar Panel With a Multimeter
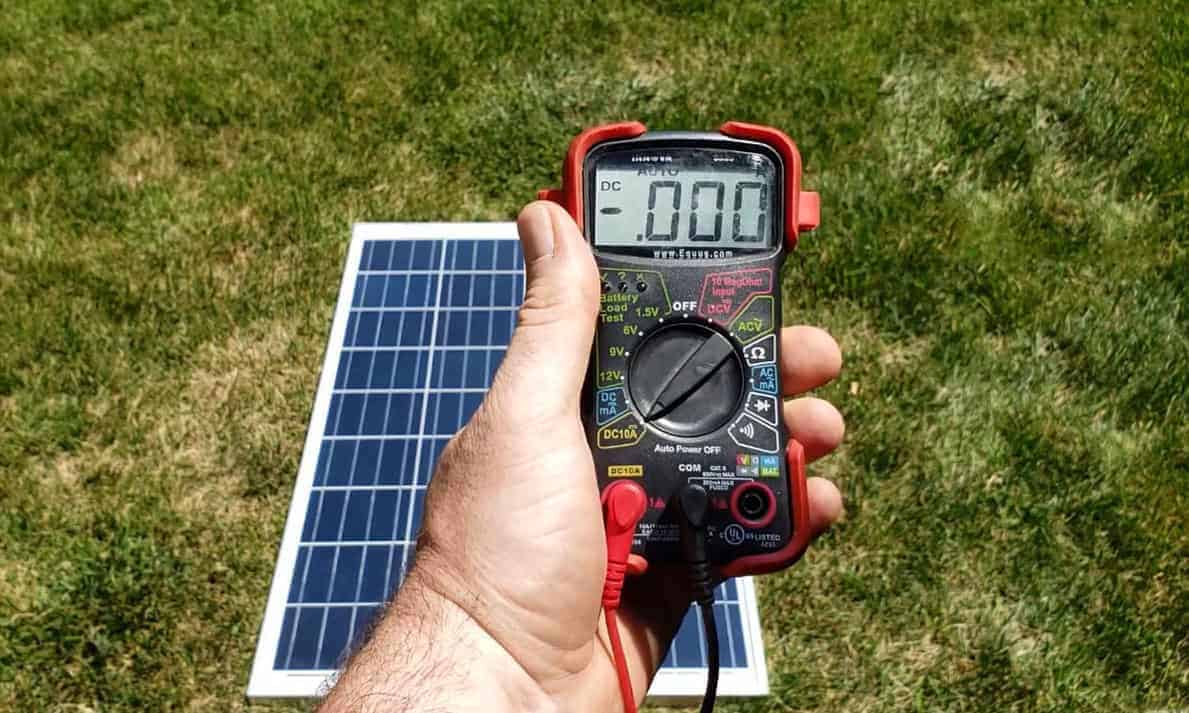
A multimeter is a handheld device, which you use to determine voltage, amperage, and other values. The most common type of multimeter is digital, which is more advanced than an analog one.
Although one might opt for an analog multimeter because it’s cheaper, it may be more difficult for some users to interpret the readings accurately compared to a digital multimeter.
Before you put your multimeter to use, remember that incorrect use can damage your solar panels.
Find The Converter Box
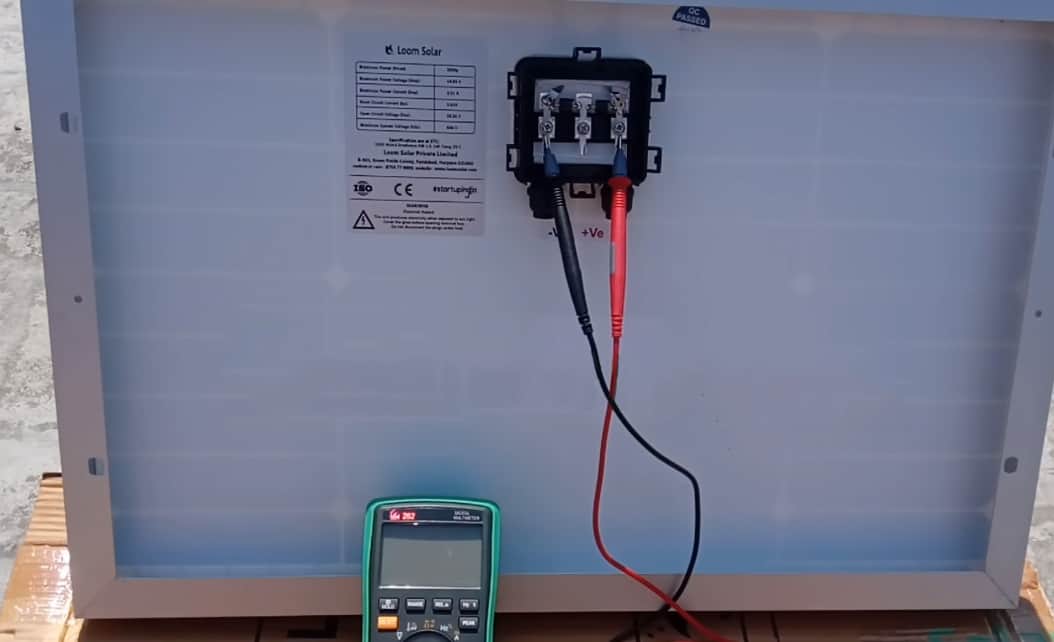
You will find the converter box at the back of your solar panel. Remove its cover so you can clearly see the wiring inside. Exposing the back will help you see the positive and negative connections.
Before you go to the next step, angle the panel in the direction of the sun.
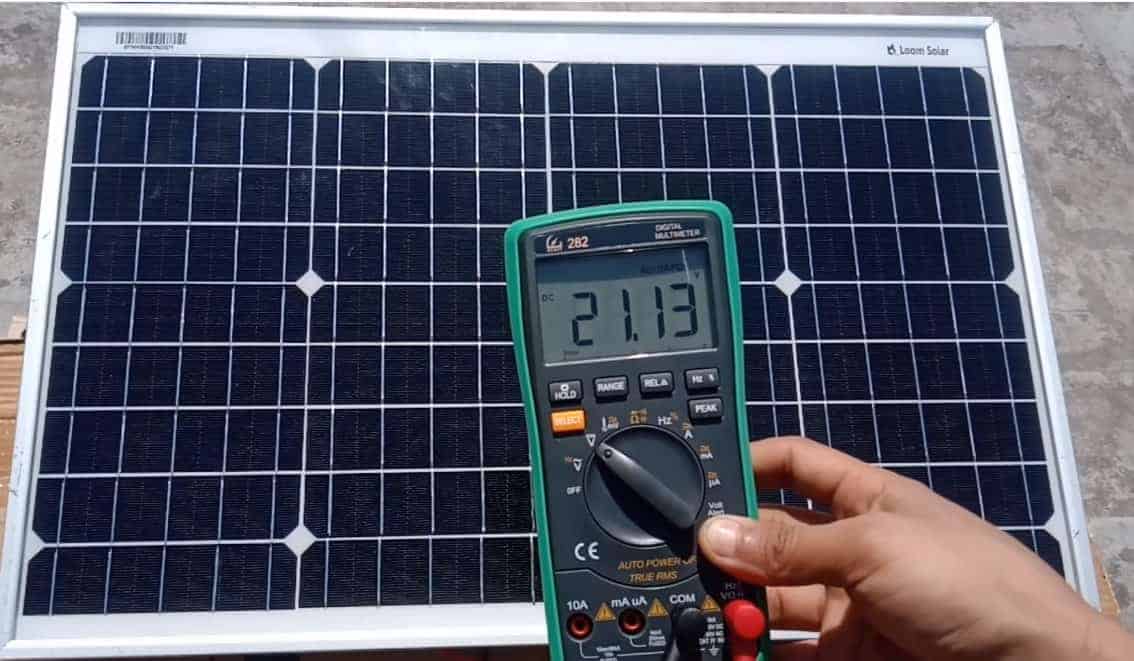
Multimeter Must Be Set to DC
You have to keep in mind that your multimeter settings should be higher than your panel’s voltage. For instance, if it’s a 12v, set your multimeter a reading higher. Such a reading will provide an accurate measurement.
The details of your panel’s voltage rating are inside the converter box.
Connect Alligator Clips
Clip the red lead of your alligator clips on the positive side and the black on the negative. The multimeter will give you a reading to show the output of your panel. Expect a strong reading from new solar panels.
However, if your solar panels have been in use before, the reading will be lower. Don’t remove the alligator clips before switching off the multimeter.
How to Test A 12 Volt Solar Panel
Because most solar panels come with a 12v rating, they are the most common to test. Basically, you test a 12v solar panel like other voltages.
Ensure the meter is set at 200 volts DC before you start. An overload means you need to turn up the volts DC. Once you have everything right, you will get a proper reading.
How to Check the Solar Charge Controller
About the Solar Charge Controller
A solar charge controller is a regulator that keeps voltage or current from solar panels in check to avoid the batteries overcharging.
Although a charge controller is crucial, you don’t always need one, especially when dealing with small panels up to 5w. However, 12v panels whose output can be high need a charge controller to protect batteries from overload.
Charge controllers come in two categories. You can either buy a pulse-width modulation or a PWM or get maximum power point tracking (MPPT). PWMs are simple and use a switch that opens and closes fast enough to regulate the electricity coming from a solar panel.
On the other hand, MPPTs are more advanced. They find the best operating voltage to produce the most power. Although MPPTs are more expensive, their technology is not necessarily better than that of PWMs.
How Do You Test the Charge Controller?
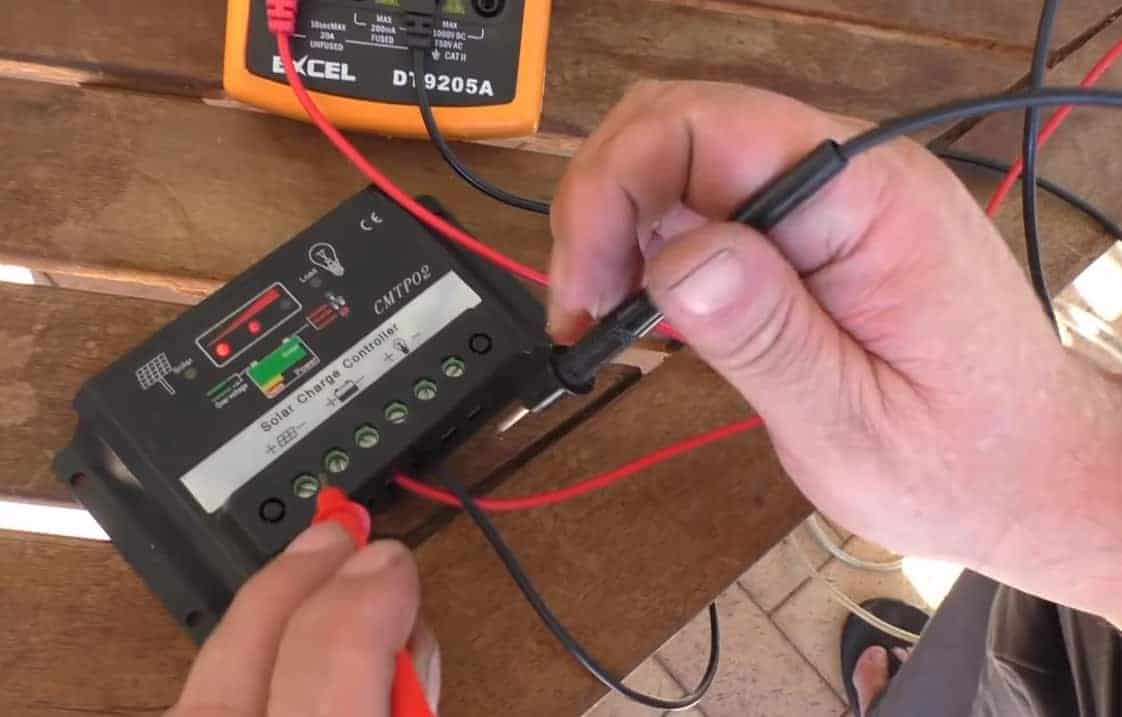
- Put the leads in the right positive-positive and negative-negative slots to measure DC amps.
- With the meter at -10A, connect everything as follows: Solar panel – controller – battery.
- Remove the positive cable used to connect the controller to the battery. Then, connect the positive from the meter to the positive cable.
- Finally, hook the meter’s negative lead to the battery’s negative terminal.
- This connection will show you the current flowing to the battery from the solar panel and the controller.
Common Solar Panel Problems
After your solar panels pass the test, you need to take good care of them.
Should you encounter any problems, have them fixed as soon as possible to ensure optimal usage.
Faulty Wiring
These electrical issues can prevent your panels from performing well. If you have loose connections or corroded cables, you can call an electrician to check them out. Avoid tampering with solar panels unless you are a qualified technician.
Cracks On Your Panels
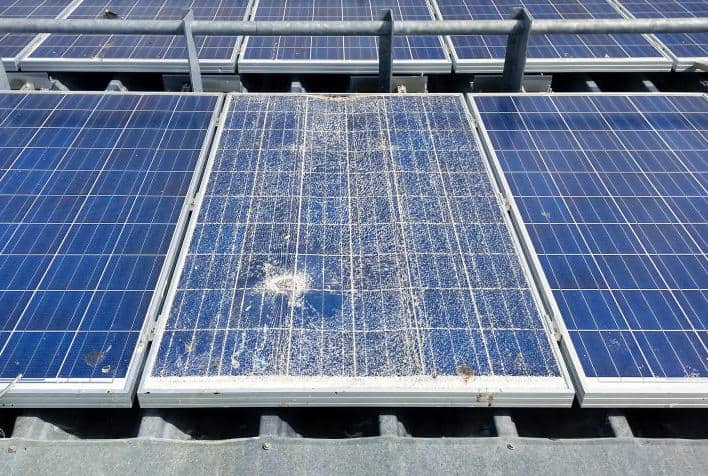
The cracks on your solar panel can be so tiny that you miss them. But, the damages can grow more extensive due to weather impacts.
Usually, small cracks occur during shipping as a result of being mishandled. From the get-go, you should deal with a professional to move the panels.
Hot Spots
So dangerous are hot spots to your solar panel that they can destroy your system for good. If your panels overload or overheat, they’re at risk of hot spots.
Typically, a pileup of dirt on the panels and poorly soldered joints can cause hot spots. If your panels have hot spots, their performance can go down.
When Birds Live Under Your Panels
If birds nest under your panels, they can scratch them or damage the cables. To solve this, you can use plastic strips and fasten them to the panels. Alternatively, you can install roof-integrated panels, which leave no gaps for birds to make their home.
Inverter Issues
Although solar panels usually have a shelf life of up to 20 years, inverters have a shorter lifespan. There’s no need to worry if you find yourself having to change your solar inverter every 10 to 15 years.
However, should the inverter problems start too early, you can check the manufacturer’s terms. Consider checking the inverter’s warranty to see if you can get a replacement.
Roof Damage
When properly installed, solar panels can provide good coverage for your roof. They can cover roof decay or any other visible damage.
Plus, they can extend the lifespan of your roof by protecting it from damage by harsh weather. But, a poorly installed system can damage your roof. Therefore, consider having an expert install the panels for you.
Final Thoughts
Testing solar panels might sound too technical. But, with this breakdown, you can rest assured you’ll have a performing panel. All you need to learn are the basics. First, you must understand how solar panels work, their output, and your needs.
Secondly, as long as you know how to work around a multimeter, you’ll get an accurate reading for your panels. Also, it is essential to test your charge controller. The more efficient it is, the safer your batteries will be. Remember, batteries are the reservoir of all the energy absorbed by your panels.
If all the tests are successful, go ahead and install those solar panels.

